Etsy link

Monday, 2 March 2015

A new make

Monday comes around so quickly, too quickly for me so I would like to rewind back to the weekend and share with you a project I have made to support my selling ventures.

I have started to make earrings, mostly due to the magpie in me that loves all things shiny.

My goal is to sell my earrings at local craft fairs, to fund my habit further.

Displaying the finished product gave me an opportunity to draw on my love for paper and ink.

I have had a little wooden house for a while and not been sure what to do with it. I enjoy making pretty things but prefer not to have too much stuff around the house.

Inspiration struck and I decided to use my house to showcase some of my earrings.

My lovely husband bought me this blank house for Christmas on one of our rare visits to the Indigoblu shop in Retford


This is what it looks like when covered with a coat of gesso, white acrylic paint, stamped with a flourish and lined with pretty papers.


I had great fun making it and attached springs to the 'ceiling' using a glue gun to hang each earring.
This makes it so easy to add different earrings and to dismantle between sales.

Choosing which earrings to put into each section will be tough, some of the smaller earrings may get lost in the patterns.

 
What do you think?


Sunday, 1 March 2015

Tasty Treats

Victoria Sponge

Who doesn't love a simple Victoria sponge cake?

Below is my favourite recipe taken from The River Cottage Collection.

Ingredients
175g self raising flour
pinch of sea salt
175g unsalted butter, cut into small pieces and softened
175g caster or vanilla sugar, plus extra to finish
3 medium eggs, lightly beaten
1tsp vanilla extract
3-4 tbsp. soft set raspberry jam

Equipment
2 x 20cm sandwich tins or a 23cm round tin, lightly greased and base lined with baking parchment

Method
pre heat oven to 190C/gas mark 4
Sift the flour and salt together into a bowl and put aside

In a large bowl beat the butter to a cream

Add the caster sugar and continue to beat until light and creamy ( this will take around 5 mins using an electric whisk and 10 mins by hand) The lighter and fluffier the mixture is the easier it will be to blend in the eggs, which in turns helps to prevent the mixture from curdling.

Add the eggs about a quarter at a time, adding 1tbsp of the weighed out flour with each addition and beating thoroughly before adding the next. Beat in the vanilla extract with the last of the egg.

Sift in the rest of the flour, half at a time and use a metal spoon to carefully fold it in. The mixture should drop off the spoon easily when tapped against the side of the bowl. If it doesn't then add a spoonful of hot water.

Divide the mixture equally between the prepared sandwich tins, spreading it out evenly with the back of a spoon.

Bake in the centre of the oven for about 25 minutes or until the cake(s) are lightly golden and spring back into shape when gently pressed with a finger.

Leave the cakes in the tins to cool for a couple of minutes before turning out onto a rack to cool completely.

When cold spread on cake layer with the jam, place the second on top and dust lightly with caster sugar.

This cake will keep for 5 days in an air tight container.

I know this cake definitely doesn't last 5 days in my house!

Put the kettle on and enjoy.


Saturday, 28 February 2015

A Look Inside

Today I thought I would share with you my work space, my little place in heaven.


This is where I play with all my 'stuff'.  Its kind of an organised chaos with most things I can put my hand to pretty easily.

Every once in a while I decide to tidy up and have a sort out. These days are great. The things I find that I forgot I even had them. Its a great thing to do when I am not sure what I want to create.

The things I find fill me with new inspiration. Saved empty bottles and bits from Jeff's garage usually get the grey matter ticking.

I look forward to sharing some of the new things I am making with you soon

Take care
Sam

Sunday, 2 February 2014

From the heart


This weekend I decided to create my Indogoblu challenge piece.

My beloved bought me loads of goodies for Christmas and in the stash was a MDF door hanger.

I covered it with gesso and then applied a coat of pantry white acrylic paint. I distress around the edges with distress ink worn lipstick.

It got really messy next with some squirts of dylusions ink sprays, pink blue and yellow.

I stamped the ' love is' image with archival black ink and added some colour using distress inks, picked up with my aqua brush.

I also stamped 'script' using a light grey ink and finally using blue ink I stamped 'harlequin' to add some interest.

Using a Martha Stewart punch I created some flowers coloured with matching inks to compliment the scheme. I used round nosed pliers to coil odd bits of black wire to tuck in with the flowers.

Adding the lace around the edge wasn't easy!  Some pink glitter stickles covered a multitude of sins.

The final embellishments were made using a flourish spellbinders die, craft foam and painting it with silver acrylic paint.

This project will hang from my craft room door with pride.


Sunday, 22 December 2013

Don't Forget ...

I recently bought a cheap wipe clean notice board, to help me remember the crafty makes I need to make.

This weekend I played nicely with it and I am very pleased with the finished look.

Ingredients

Wipe clean board from The Range.
Indigoblu acrylic paint hot cocoa & pantry white.
Reeves metallic acrylic paint.
Spellbinders cutting dies leaves, fantastic flourish one.
Cheery Lyn cutting dies, leaves, large flower, lily.
Silicone mould, buttons, key, bee & crown.
Indigoblu stamps, sheet music & flutterby.
Distress inks, various colours.
Hot glue.
Cosmic shimmer spray green.
Cardstock and acetate.

Method

I removed the white wipe clean board, leaving just the frame.
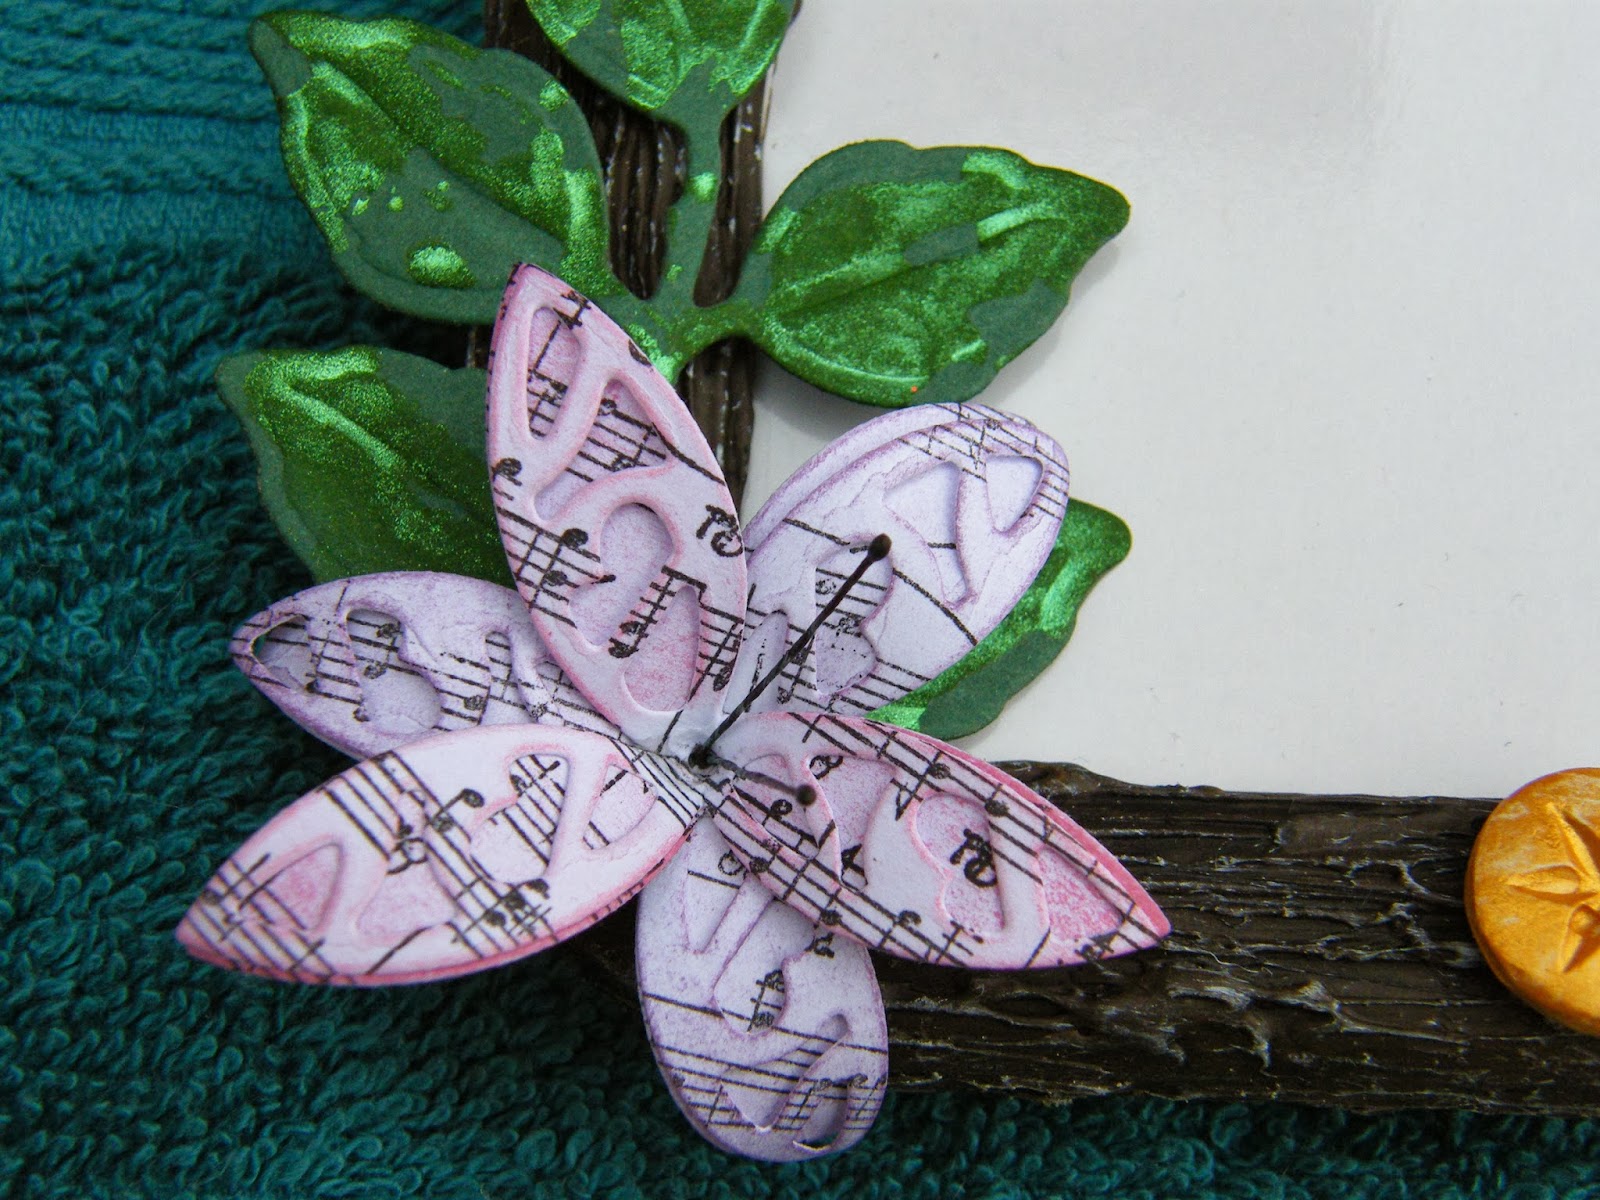
The frame was then painted with brown paint. Once dry I applied the hot glue to the frame randomly. A second coat of brown was then applied. To give the frame an aged look I applied a small amount of  white paint using  A dry brush.

The leaves were made using the cutting dies and applying a small amount of cosmic shimmer spray.
The flowers were created by first stamping the sheet music stamp onto white card stock, then die cutting flowers. Coloured using the distress inks with an ink duster and finished with little stamens.
The remaining embellishments were all made out of air dry clay and silicone moulds, then painted using metallic paints.

The butterfly was stamped onto metallic card stock and acetate. The acetate butterfly was coloured using promarkers then mounted on top of the card version.

The scroll of music was by stamping the sheet music stamp onto white paper, then distressed using distress inks and tied with an odd piece of cord to hold together.

All the embellishments were stuck to the frame using silicone glue.

The wipe clean white board was the slid back into place .

I have enjoyed making this really useful item.


Sunday, 24 November 2013

Indigoblu challenge.....lest we forget.

Having enjoyed last months challenge I thought I would have a go at this months.

I decided to make a card, although this wasn't my first choice.
 
I originally got some air dry clay and stamped the poppy image into it, complete with coloured ink. I then cut it out with a cookie cutter and made a hole in the top. The idea was to make a pendant however, the ink didn't keep its sharp colour and it bled into the clay.


The card I made is 6x6 white with red and black mat and layering.
The main image was made using super smooth card.
I masked around the edges to get a crisp border, then stamped my sentiment and two poppies.
The zentangle art was then added. I left a small border around each stamped image to make it easier to pick out of the patterns.
The first card I made didn't have a sentiment however, I remembered the Alice in wonderland stamps and liked the idea of....if you can see the poppies then you will understand their meaning.

The finished card you see here is take 2 of my first attempt at zentangle art.

My sore fingers are testament to the concentration and time its taken. What a great way to spend a Sunday.


Monday, 11 November 2013

Chocolate orange

As an avid fan of all things Indigoblu, I decided to have a go at one of their blog challenges.

Since I have loads of cards I decided to use one of the folk hearts I have had for a while.

The theme is chocolate orange.

Ingredients

Indigoblu MDF medium folk heart
Indigoblu A5 stamps 'Enjoy life' & 'Blooming great'
Indigoblu acrylic paints 'Burning bonfire' & 'Hot cocoa'
Indigoblu mega flakes 'Copper kettle'
Martha Stewart punch 'Cosmos'
Silicone glue
Tiny orange & brown brads, pearl beads, gold gems, orange fine glitter
and a length of gold coloured chain.


Method

I painted the heart in orange paint. Once dried I mixed a dab of brown paint with some Kroma crackle. The layer of Kroma crackle was applied quite thick so as to make a nice deep crack in the finished item. Slap it on was then applied to seal and stop the cracking process.

I painted some orange card stock with the brown paint, using different brush strokes. I also stamped on the orange card to add interest before punching out the flower shapes.

The sentiment was stamped with flitterglu and finished with mega flakes. I cut the words 'Making Daisy Chains' into individuals.

Using a head pin and assorted pearls I made the embellishment to hang at the bottom of the gold chain. The punched flowers are attached to the chain and the chain then feeds through the hole at the top of the heart to make a loop in which to hang.

To finish I ran some flitterglu around the edges and rubbed in some ultra fine orange glitter.

Once everything was stuck in place I think I have quite a nice decoration that's a little bit different.

Taking a photo that does this piece any justice was really difficult. In 'real life' it looks very shiny and the crackle looks like a rich chocolate with a hidden tangy centre.